
web analytics

Outdoor Skills: Navigation, Layering, Safety & Training

Practical, tested, and built for real conditions. No fluff. No theory that falls apart on the hill. Just clear, usable skills that make every day outside feel more confident and more fun.

Clothing & Layering

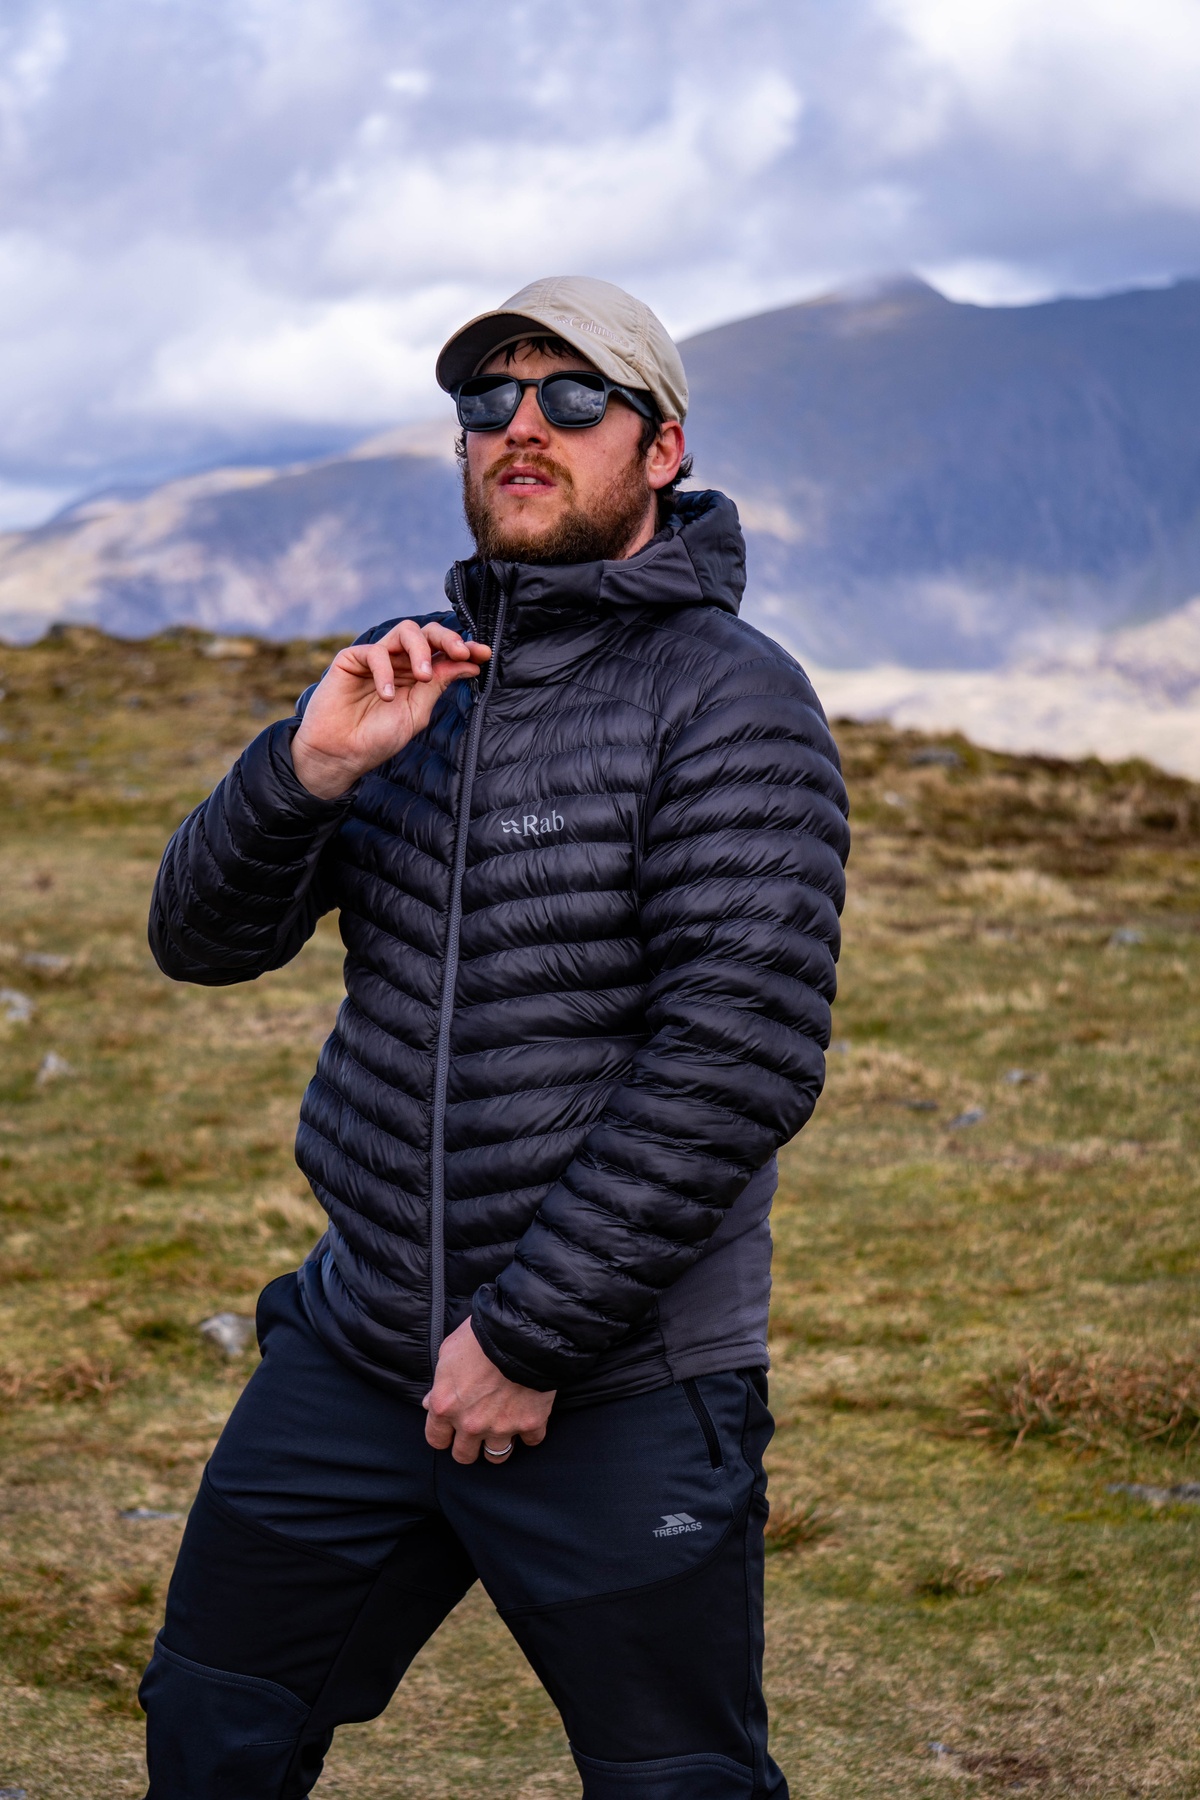
Getting your clothing right is the single most practical skill you can develop for outdoor comfort. The goal isn't to stay dry at all costs — it's to manage your body's moisture and temperature across changing conditions and exertion levels.

The three-layer system (base, mid, shell) is the proven framework, but success comes from understanding how each layer interacts, when to add or remove them, and how the system changes across seasons. Getting it wrong means being too hot, too cold, or too wet — all of which can ruin a day or create safety risks.

Clothing and layering for the outdoors

The technical guides below are written for people who hike and explore the outdoors with intent — whether you're building it into a serious passion or steadily pushing into bigger days out.

If you're heading out for a simple countryside walk, a well‑known local trail, or a low‑risk day with friends, you don't need to overthink it. A well‑fitted pair of boots or shoes, weather‑appropriate clothing, plenty of water, a few snacks, and a clear understanding of your route and terrain will usually be enough.

These guides are here for when you want to go further — when the hills get bigger, the weather gets sharper, and good habits start to matter.

Packing & Preparation

What you carry and how you carry it has a direct impact on how much you enjoy your time outside. The right gear makes the day better; the wrong gear — or too much of it — makes every step harder.

The principles are simple: carry what you need, know how to use it, and organise it so you can access it without unpacking everything. A well-packed bag is comfortable, balanced, and leaves room for the essentials: safety kit, extra layers, food, and water.

Safety & Decision-Making

Staying safe in the hills is less about gear and more about the decisions you make before and during a day out. Risk is managed through preparation, awareness, and the willingness to change your plans when conditions demand it.

The six areas that matter most: reading weather forecasts accurately, knowing emergency procedures, having the discipline to turn back, understanding group dynamics versus solo responsibility, navigating your way out of trouble, and carrying appropriate first aid knowledge for remote environments.

Endurance & Training

Long days in the mountains demand a different kind of fitness than a gym workout or a casual run. The goal is to sustain steady effort over many hours, on steep and uneven terrain, often while carrying weight.

Building that capacity takes a structured approach: a solid aerobic base, hill-specific strength, smart recovery, and the mental resilience to keep going when the body wants to stop. These skills are trainable — and they transfer directly to how you feel on the hill.

Skills in Action

What I Learned from Navigation Practice in the Dark

Skills / Skills in Action

There's a big difference between reading about navigation and actually doing navigation when the world shrinks to the narrow beam of your headtorch. In daylight, you get away with assumptions — the path is visible, the summit is obvious, the terrain gives you clues without you even realising it. At night, all of that disappears. It's just you, the map, the compass, and whatever confidence you've built.

I took myself out on a moonless night with nothing but the basics: map, compass, headtorch. No GPS, no shortcuts. The first twenty minutes were humbling. The path I thought I knew felt unfamiliar. Every shadow looked like a feature. Every rustle made me second-guess myself. You realise quickly how much daylight navigation relies on comfort, not skill.

But after an hour, something shifted. The map started to make sense in a way it never had in daylight. Without visual shortcuts, you're forced to actually read the land — not what you see, but what you feel under your feet and what the contours tell you.

Skills only become real when they're tested in conditions that matter. Practice in the dark, in the rain, when you're tired — that's when they stick.
The map is a conversation with the landscape. Learn to speak its language.
Read More
Modern

Digital Navigation

Navigation apps have transformed how we plan and execute days in the hills. OS Maps, AllTrails, and ViewRanger make route planning fast and intuitive. But they should complement — never replace — traditional map and compass skills.

Download offline maps before you leave signal. Battery life plummets in cold conditions; carry a power bank and keep your phone in aeroplane mode to preserve charge. Use GPS to confirm your position, not to plan your route in real time — that's what the pre-trip planning phase is for.

The critical rule: always carry a physical map and compass as backup. Phones break, screens crack, batteries die. Digital navigation is a powerful tool, but it's not a primary safety system.

This guidance is based on personal experience. Always assess conditions, prepare properly, and make decisions based on your own safety and judgement. Full disclaimer

Watch Video
Advanced

Night & Poor Visibility

Safety note: These techniques help in poor visibility, but they assume you're already comfortable using a map and compass, or extremely knowledgeable with the route and terrain. If you're not confident, practice with an experienced partner or take a navigation course first. Read our full safety guidance.

Navigating in mist, rain, or darkness demands deliberate technique. Your visual range shrinks, familiar landmarks disappear, and it's easy to drift off course. Good habits matter — but only if you're already confident with a map and compass in the conditions you expect to face.

Check your position frequently; if conditions worsen, choose the safest option, not the planned line.

Use a red light for close work like reading the map — it preserves night vision and doesn't wash out contrast. Switch briefly to white light to check the wider scene, then return to red. Count paces between features on open terrain and practise with your actual kit.

Break your route into short legs using attack points — wall corners, stream junctions, fence lines — and confirm your position often rather than relying on one long bearing.

Aim off when heading for a linear feature like a ridge or path so you know which direction to turn when you hit it. Combine aiming off with pacing to stop small errors stacking up.

If you're unsure at any point, turn back, wait, or choose the safest alternative.

This guidance is based on personal experience. Always assess conditions, prepare properly, and make decisions based on your own safety and judgement. Full disclaimer

Watch Video
Technical Gear

Choosing a Waterproof Jacket

A waterproof jacket is the most technical piece of outdoor clothing. The membrane (Gore-Tex, eVent, or proprietary) provides waterproofing while allowing vapour to escape. Two-layer construction is lighter and more packable, three-layer is more durable for regular mountain use. Fully taped seams and a water-resistant zipper are essential for real weather protection.

The hood is the most important feature. It should fit comfortably over a helmet or hat, move with your head when you turn, and have wired peak to keep rain off your face. Opt for a Jacket with Pit zips, if you are planning high-output days in challenging conditions — they allow rapid venting without removing the jacket. A drop hem and adjustable cuffs help seal warmth in.

Denier (D) measures the outer fabric weight. 30D is lightweight and packable, 70D+ is more abrasion-resistant for mountain use. For UK hill walking, 40-70D with a reliable membrane is the sweet spot. DWR (durable water repellent) coating needs periodic reactivation — a quick wash with tech wash and tumble dry on low heat restores it.

This guidance is based on personal experience. Always assess conditions, prepare properly, and make decisions based on your own safety and judgement. Full disclaimer

Watch Video
Guide

Trousers for the Trail

Soft-shell trousers are the default choice for UK hill walking. They offer stretch for movement, breathability for sustained effort, and enough weather resistance for light rain and wind. Look for articulated knees for unrestricted movement, a scuff guard on the inner ankle to protect against boot rub, and a drawcord waist for adjustment without a belt.

Waterproof overtrousers (overpants) are essential for persistent rain or deep snow. They should be lightweight and packable, with full-length side zips that allow you to put them on and take them off without removing your boots. In mild conditions, you may only need them in your pack for emergencies — but they should always be there.

For summer walking, convertible trousers with zip-off legs give flexibility. For winter, look for lined or insulated options. Avoid jeans at all costs — they are heavy, restrictive, and dangerous when wet. A simple pair of walking trousers with a water-repellent finish handles the vast majority of UK conditions.

This guidance is based on personal experience. Always assess conditions, prepare properly, and make decisions based on your own safety and judgement. Full disclaimer

Watch Video
Essential

Hands, Head & Feet

You lose a significant amount of heat through your head — a lightweight beanie or merino buff should be in your pack year-round. In summer, a cap with a brim or a sun hat protects from sun and glare. A buff or neck gaiter is versatile: warmth, sun protection, dust filter, or emergency bandage. Carry at least two headwear options.

Gloves are best as a two-layer system. A thin merino or synthetic liner allows dexterity for map reading, photography, and zips. A waterproof mitt or insulated overmitt goes over the top for cold or wet conditions. Carry a spare pair of liner gloves in winter — they are surprisingly easy to lose and surprisingly miserable to be without.

Feet require the most attention. A thin liner sock under a medium-weight merino sock reduces friction and blister risk. Keep spare socks in a dry bag — changing into dry socks at lunch is one of the simplest luxuries on a wet day. Address hot spots immediately with tape or blister plasters; a small prevention now saves a major problem later.

This guidance is based on personal experience. Always assess conditions, prepare properly, and make decisions based on your own safety and judgement. Full disclaimer

Watch Video
Technical Gear

Choosing the Right Footwear

Your feet carry every mile. Choosing the right boots or shoes — and getting the fit right — is the single most important decision you'll make for comfort in the hills. Fit is king. Comfort is non-negotiable. Your feet decide.

1. Match Footwear to Terrain

Different terrain demands different footwear. Choose based on where you hike, not what looks good.

  • Hiking Shoes — light, flexible, ideal for well-maintained trails and long mileage.
  • Hiking Boots — more support and stability for rough ground, wet conditions, and heavier packs.
  • Approach Shoes — precise, stiff, and grippy for rocky scrambles and technical terrain.
  • Winter Boots (B2/B3) — insulated, stiff, and crampon-compatible for snow and ice.

2. Fit Is Everything

A perfect fit prevents blisters, fatigue, and instability. Here's how to test it properly in-store.

Wear Your Actual Hiking Socks — bring the socks you'll use on the trail. Sock thickness changes fit more than people realise.

Heel Lock Test — lace up normally, stand, and lift your heel. Goal: minimal movement. More than 3-4mm means guaranteed blisters.

Downhill Toe Test — walk down the store ramp. Goal: toes must not hit the front. If they do, the boot is too small or the shape is wrong for your foot.

Midfoot Wrap Check — the shoe should "hug" your midfoot with no dead space and no pressure points. Side-to-side movement means instability on uneven terrain.

Length Check (The Finger Test) — slide your foot forward until toes touch the front. You should fit one finger behind your heel. This gives enough downhill space without being sloppy.

Flex Test — bend the shoe with your hands. Shoes are flexible, boots have moderate flex, mountaineering boots are very stiff. Match flex to terrain.

Hotspot Hunt — walk around for 10 minutes. Any rubbing, pressure, or discomfort now will be ten times worse on the trail.

3. Know Your Foot Shape

Foot shape determines fit more than brand.

  • Wide feet → Keen, Altra, some Hoka
  • Narrow feet → La Sportiva, Scarpa, Salomon
  • High-volume feet → deeper boots
  • Low-volume feet → snug, precise fits

Toe box shape matters — square, round, or pointed must match your natural toe spread. If the shape doesn't match your foot, no amount of sizing will fix it.

4. Lacing Techniques

Smart lacing solves most fit issues.

  • Heel lock — stops heel lift
  • Window lacing — relieves top-of-foot pressure
  • Toe-relief lacing — reduces downhill toe impact
  • Surgeon's knot — locks midfoot securely

Learn these. They're game-changers.

5. Insoles

Stock insoles are usually poor. A supportive insole can improve heel hold, arch support, and overall comfort — but only if it matches your arch height.

6. Waterproof vs Non-Waterproof

Choose based on climate, not marketing.

  • Waterproof (Gore-Tex) — best for wet grass, boggy trails, and cold conditions.
  • Non-waterproof — best for hot climates, fast drying, and long summer days.

7. Break-In Time

  • Trail shoes → almost none
  • Hiking boots → a few short walks
  • Mountaineering boots → several outings before big days

Never take brand-new boots on a long hike.

8. The Golden Rule

If it doesn't feel perfect in the store, it won't feel perfect on the mountain. Fit is king. Comfort is non-negotiable. Your feet decide.

This guidance is based on personal experience. Always assess conditions, prepare properly, and make decisions based on your own safety and judgement. Full disclaimer

Advanced

Multi-Day Trip Packing

Packing for multiple days is a different mindset. Your pack becomes part of you, and how you load it matters more than what you bring.

Aim for a total weight around 20–25% of your body weight. If you're creeping above that, lay everything out and question each item. Redundancy is the enemy of comfort.

Heavy kit — your tent, food, stove, water — should sit tight against your spine at shoulder height. That's your centre of gravity. Medium-weight items live in the middle of the pack. The light, bulky stuff — sleeping bag, insulation — fills the bottom and builds a soft foundation.

Use dry bags to organise and compress. Colour-code them so you can grab what you need without tearing your whole pack apart. Strip out duplicates: one cable, one multi-tool, shared toiletries. Plan your meals properly and ditch excess packaging before you leave home — grams add up fast.

Weigh everything. Log it. This is the quickest way to see where your load is creeping. On your first multi-day trip, you'll almost certainly carry things you never touch. That's normal. Note them, and don't bring them next time.

In the end, the best gear isn't the fanciest or the newest — it's the gear you're willing to carry over every mile.

This guidance is based on personal experience. Always assess conditions, prepare properly, and make decisions based on your own safety and judgement. Full disclaimer

Watch Video
Practical

Food & Hydration Strategy

Hydration is the foundation of performance on the hill. Aim for 250-500ml of water per hour in moderate conditions, increasing in heat or high exertion. A hydration bladder (2-3L) makes drinking easy while moving, but always carry a spare bottle as backup against bladder failure. In cold weather, insulate your hose or switch to bottles to prevent freezing.

Food strategy is about prevention rather than cure. Slow-release carbohydrates (oat bars, nuts, dried fruit, flapjacks) provide sustained energy over hours. Quick sugars (gels, jelly babies, dextrose tablets) offer immediate top-ups during steep climbs or energy dips. Salty snacks (nuts, crisps, electrolyte tablets) replace sodium lost through sweat.

Eat before you feel hungry — hunger is already a sign of depletion. Set a timer for 45-minute intervals and take a few bites each time. A hot drink at lunch (flask or stove) can make a significant difference to morale and warmth on cold days. Practice your nutrition strategy on training days, not on the day that matters.

This guidance is based on personal experience. Always assess conditions, prepare properly, and make decisions based on your own safety and judgement. Full disclaimer

Watch Video
Essential

Emergency Procedures

If something goes wrong on the hill, slow everything down.

Use the STOP framework: Stop, Think, Observe, Plan. Stop moving and take a breath. Think about what actually happened — injuries, kit, options. Observe the weather, the daylight you've got left, and exactly where you are on the map. Then plan your next move before you act. Panic burns daylight and energy; STOP buys you time.

If you need help, dial 999 and ask for Police, then Mountain Rescue. Have your six-figure grid reference ready, or a What3Words location if that's all you've got. Tell them what injuries you're dealing with, what the weather is doing at your location, and when the incident happened. Stay on the line until they confirm they've got everything.

While you wait, keep the casualty warm, dry, and off the ground. Get your emergency shelter up early — hypothermia is far easier to prevent than to fix. If you need to move the casualty, do it slowly and safely. And if you're alone and injured, conserve energy, stay visible, and make noise now and again. The goal is simple: stay stable until help arrives.

This guidance is based on personal experience. Always assess conditions, prepare properly, and make decisions based on your own safety and judgement. Full disclaimer

Mindset

The Decision to Turn Back

Summit fever is real. The closer you get to your objective, the louder that voice becomes — "just a bit further, just push on". It's one of the most dangerous forces in the mountains. The cure is simple: set your turn-around time and your conditions thresholds before you even leave the car park, and commit to them no matter how close the summit feels.

There are clear signs that it's time to turn back. You're behind schedule and daylight is slipping away. The weather is worse than forecast or changing faster than expected. Someone in the group is struggling — physically or mentally. A piece of essential kit has failed or gone missing. The terrain is more serious than you planned for. Any one of these is enough. You don't need a combination.

No summit is worth a rescue. The mountains will still be there tomorrow, next month, next year. The people who last longest in the hills are the ones who've turned back the most — they know that good judgement is the skill that keeps you coming home. A day cut short is still a day in the hills.

This guidance is based on personal experience. Always assess conditions, prepare properly, and make decisions based on your own safety and judgement. Full disclaimer

Advanced

Group vs Solo Dynamics

Walking in a group spreads the risk, but it also adds team dynamics you need to manage. Pick a clear leader for navigation and safety calls, but make sure everyone feels able to speak up — the best decisions come from shared awareness, not one person guessing alone. Agree your communication before you set off: check-ins at key waypoints, signals for stopping, and a shared understanding of the route and the escape options if things change.

Solo walking is a different world. Your margin for error drops to almost nothing — there's no one to catch a mistake, share a decision, or call for help if you're the one who goes down. Leave a detailed route card with someone you trust: your plan, timings, and emergency contacts. Check in when you said you would.

Be more conservative with weather and route choices when you're on your own. If conditions look marginal, pick an easier objective. Solo navigation demands higher skill — map and compass work needs to be automatic. For remote solo days, carry a PLB or satellite messenger. It's the one piece of kit that can still help you when you can't help yourself.

This guidance is based on personal experience. Always assess conditions, prepare properly, and make decisions based on your own safety and judgement. Full disclaimer

Critical

Navigation Emergencies

If you realise you're lost, stop. Right there. The most dangerous thing you can do is keep walking and hope the path magically reappears. Get your map and compass out. Think back to the last point where you were absolutely sure of your location, and rebuild the story from there.

If you can't relocate within about twenty minutes, retrace your steps to the last feature you recognised. In poor visibility, set a deliberate bearing to a catching feature — a road, wall, stream, or ridge that will physically stop you or guide you. Use linear features as handrails to lead you back to safety.

If you've got a GPS-enabled device, mark your current position before you move. And don't wait until you're shivering to use your emergency shelter — hypothermia wrecks decision-making long before you feel "properly cold." Shelter early, think clearly.

If things get truly serious, follow a stream or a valley downhill. It might take longer, but water always leads to civilisation. It's the simplest escape line when everything else has failed.

This guidance is based on personal experience. Always assess conditions, prepare properly, and make decisions based on your own safety and judgement. Full disclaimer

Essential

First Aid for the Hills

Your first aid kit should match the realities of being far from help. Carry the basics that actually matter out here: blister care (compeed, zinc oxide tape), wound dressings and steri-strips, antiseptic wipes, painkillers (ibuprofen for inflammation, paracetamol for general pain), antihistamines, and any personal medication you rely on. A foil bivvy bag is one of the most valuable pieces of emergency kit you can carry — tiny, cheap, and capable of saving a life.

Know the early signs of hypothermia: uncontrollable shivering, confusion, clumsy movement, and changes in mood or behaviour. If you see them, act fast. Get the casualty out of the wind and wet, add insulation, create a vapour barrier, and give warm sweet drinks. Skip alcohol and caffeine. Hypothermia is far easier to prevent than to fix — shelter early, add layers before they ask.

Heat exhaustion looks different: headache, dizziness, nausea, heavy sweating. Move them into shade or shelter, strip off excess layers, cool them with water on the neck and wrists, and rehydrate with water and electrolytes. If symptoms progress to confusion or loss of consciousness, you're dealing with heat stroke — a medical emergency. Cool them aggressively and get them off the hill.

This guidance is based on personal experience. Always assess conditions, prepare properly, and make decisions based on your own safety and judgement. Full disclaimer

Training

Building a Base

The engine of all endurance training is Zone 2 — that easy, conversational effort around 60–70% of your max heart rate. It's the intensity that quietly builds everything you rely on in the mountains: aerobic capacity, fat metabolism, and the capillary network that feeds your muscles. Most people spend too much time in Zone 3 — the grey zone that feels productive but delivers poor results for the effort.

Spend 12–16 weeks building volume before you think about intensity. Increase your weekly time or mileage by no more than 10% per week to stay injury-free. A solid base phase usually starts around 3–4 hours per week and grows to 6–8 hours. The metric that matters is time on feet, not pace. Consistency beats any single heroic session.

Use the talk test. If you can speak in full sentences but wouldn't want to give a speech, you're in Zone 2. If you're breathing heavily through your nose, you're probably still in Zone 2. If you're down to single words between breaths, you've gone too hard. Trust the process — Zone 2 feels almost annoyingly easy at first, but that's exactly why it works.

This guidance is based on personal experience. Always assess conditions, prepare properly, and make decisions based on your own safety and judgement. Full disclaimer

Training

Hill Walking Fitness

The best training for hills is hills — nothing beats real ascent and descent. But when you can't get to them, you can still build serious mountain fitness indoors. A stair climber or a treadmill set to a 10–15% incline at 3–4 km/h mimics the sustained grind of a mountain day. Add a 5–8kg pack and you're training the exact muscles and posture you'll use on the hill. Two climbing sessions a week, each 60–90 minutes, will change your engine fast.

Structure matters. Build one longer, steady session — eventually 2–3 hours of climbing time — and one shorter interval day: 5–8 minutes uphill, 2 minutes recovery, repeated 6–8 times. The long day builds your aerobic base; the interval day teaches your body to handle steep surges without blowing up.

Don't ignore the descent. Downhill strength is what saves your quads and knees on big days. Eccentric loading is the culprit behind that two-day post-hike soreness. Train it deliberately: downhill walking, controlled step-downs, single-leg squats, lunges. Strong descents are what let you finish a long day feeling capable instead of wrecked.

This guidance is based on personal experience. Always assess conditions, prepare properly, and make decisions based on your own safety and judgement. Full disclaimer

Advanced

Ultra-Running Foundations

Stepping into ultra distances means changing the way you think about running. Pace stops being the metric. Time on feet becomes everything. Your weekly long run is the anchor — build it slowly to 3–5 hours over 12–16 weeks. The goal is sustained movement, not speed. Walk the steep climbs, jog the flats and gentle descents, run the runnable downhills. That's the rhythm of an ultra.

Dial in your nutrition on every long run. Your gut needs training as much as your legs. Aim for 200–300 calories per hour, starting within the first half hour. Mix simple and complex carbs. Once you're past 3 hours, electrolytes become non-negotiable. Test everything now — race day is not the time to discover that a gel wrecks your stomach.

Back-to-back long days are the secret weapon of ultra training. A 3-hour Saturday + 2-hour Sunday teaches your body how to move well when tired — the exact state you'll be in during an ultra. Match your terrain to your goal. Mountain ultras demand climbing strength, descending control, and technical footwork. Flat ultras demand relentless, steady efficiency.

Build the engine, train the gut, practise the rhythm. That's how you make the jump.

This guidance is based on personal experience. Always assess conditions, prepare properly, and make decisions based on your own safety and judgement. Full disclaimer

Essential

Recovery & Rest

Recovery is where the real work happens — training is just the trigger. After hard days, prioritise the basics: 8+ hours of sleep, 20–30g of protein within 30 minutes, carbs to refill your glycogen, and gentle movement to flush everything out. Even a 10-minute walk does more for your legs than lying still.

Build rest into your plan. Take one full rest day every week, no matter how good you feel. Every 3–4 weeks, cut your training volume to 50–60% for a recovery week. Watch for the warning signs that you're slipping: fatigue that doesn't shift after a good sleep, resting heart rate sitting 5+ beats above normal, broken sleep, mood dips, loss of motivation, or getting ill more often.

Listen to your body more than your plan. The athletes who last aren't the ones who smash themselves — they're the ones who recover well enough to stay consistent. A rest day you choose is worth far more than a rest week you're forced into because you pushed too far.

This guidance is based on personal experience. Always assess conditions, prepare properly, and make decisions based on your own safety and judgement. Full disclaimer

Cross-Training

Strength for the Hills

Two 30-minute strength sessions a week can completely change how you move in the hills. Focus on the exercises that actually matter out there: single-leg squats or step-ups for climbing strength and balance, deadlifts or Romanian deadlifts for the posterior chain that keeps you stable under load, calf raises for ankle resilience, and solid core work — planks, side planks, bird dogs — to transfer load cleanly between your upper and lower body.

Add the small but crucial pieces most people skip: lateral band walks and single-leg hip bridges for hip stability, Pallof presses and loaded carries for rotational control with a pack, and tibialis raises plus ankle mobility to protect your ankles on rough ground. These are the exercises that make steep terrain feel smoother and descents feel controlled.

Start with bodyweight. Add load only when every rep looks perfect. Slow, controlled movement is the goal — especially the lowering phase. That eccentric strength is what gives you confident, pain-free descents. Aim for 3 sets of 8–12 reps, twice a week.

Prioritise single-leg work. Hill movement is one-leg-at-a-time, so your training should be too. A simple routine done consistently beats a complicated routine done occasionally. The goal isn't gym strength — it's mountain strength. If your legs feel more stable on steep ground and your descents feel smoother, you're doing it right.

This guidance is based on personal experience. Always assess conditions, prepare properly, and make decisions based on your own safety and judgement. Full disclaimer

Mindset

Mental Endurance

Long efforts in the mountains are won before they start. Break the day into manageable segments — focus only on reaching the next checkpoint, not the summit. When the summit feels impossibly far, the next stream junction or ridge crest is achievable. This technique, called chunking, keeps the scale of the day from overwhelming you.

Use mantras or counting rhythms on steep sections. A simple four-count breathing pattern — four steps in, four steps out — regulates effort and gives your mind something steady to hold onto. Accept discomfort as part of the process rather than a signal to stop. Effort and harm are different sensations — learn the difference.

When things get tough, name what you're feeling: fatigue, frustration, doubt. Labelling the sensation takes the sting out of it. Most emotional spikes last about ninety seconds — breathe through them and they pass. Make decisions for your future self, not your current discomfort. Micro-rewards help too: a sip of water at the next cairn, a gel at the next ridge.

Visualise the route before you set out, including the hard parts. When you meet them on the hill, they feel familiar — your mind has already rehearsed them. Offload decisions early: pace, nutrition, checkpoints. Save your mental energy for the moments that matter. And when you're deep in the effort, picture the finish — the relief, the pride, the version of yourself you're building.

The mind gives up before the body does, but the mind can be trained. Every long day is a chance to practise staying steady when things get hard.

This guidance is based on personal experience. Always assess conditions, prepare properly, and make decisions based on your own safety and judgement. Full disclaimer